In the world of car maintenance, knowing what to do after changing fuel injectors is crucial for smooth engine operation. After completing the fuel injector replacement process, there are essential steps to follow to ensure optimal performance and longevity of your vehicle.
From ensuring proper installation to conducting thorough testing, this guide covers everything you need to know. By following these steps diligently, you can prevent potential issues like fuel leaks or engine misfires, and keep your vehicle running smoothly for miles to come.
So, let’s dive into the post-fuel injector replacement journey and learn how to keep your engine purring like a contented cat.
What to Do After Changing Fuel Injectors
Let’s walk through the process step by step, making sure you know exactly what to do after changing fuel injectors.
- Perform a System Check: After installing the new fuel injectors, the first step is to perform a comprehensive system check. Start by inspecting all connections, ensuring they are tight and secure. Look for any signs of leakage around the fuel injectors or fuel lines. A small leak can lead to bigger problems down the road, so it’s essential to catch and address any issues early on.
- Test for Leaks: Leaks can be a common issue after changing fuel injectors. To test for leaks, start the engine and let it idle for a few minutes. Then, carefully inspect around each fuel injector for any signs of leaks, such as dripping fuel or a strong smell of gasoline. Use a flashlight if necessary to thoroughly examine each injector and their connections.
- Calibrate the Fuel Injector System (if necessary): Depending on your vehicle’s make and model, you may need to calibrate the fuel injector system after replacement. Calibration ensures that the fuel injectors deliver the right amount of fuel at the right time for optimal engine performance. Refer to your vehicle’s manual or consult a professional mechanic to determine if calibration is necessary and how to perform it.
- Test Engine Performance: Once you’ve completed the system check and addressed any leaks or calibration needs, it’s time to test the engine performance. Take your vehicle for a test drive and pay attention to how it accelerates, idles, and responds to throttle inputs. Listen for any unusual noises or vibrations, as these could indicate underlying issues with the fuel injection system or engine.
- Monitor Fuel Efficiency: After changing fuel injectors, it’s essential to monitor your vehicle’s fuel efficiency. Keep track of your fuel consumption and compare it to previous records. Improved fuel efficiency is often a sign of properly functioning fuel injectors. However, if you notice a decrease in fuel efficiency or any other performance issues, it’s best to address them promptly.
- Addressing Any Issues Promptly: If you encounter any issues or abnormalities during the test drive or while monitoring fuel efficiency, don’t ignore them. Addressing problems promptly can prevent further damage to your vehicle and ensure continued smooth operation. Whether it’s rough idling, decreased fuel efficiency, or unusual engine noises, consult a professional mechanic to diagnose and resolve the issue.
- Regular Maintenance and Inspections: To ensure long-term reliability and performance, schedule regular maintenance and inspections for your vehicle. This includes checking the fuel injectors, fuel lines, and other related components for any signs of wear or damage. By staying proactive with maintenance, you can catch potential issues early and avoid costly repairs down the road.
By following these steps and taking the time to properly check and test your fuel injector system after installation, you can ensure that your engine continues to run smoothly and efficiently. Remember, regular maintenance and proactive troubleshooting are key to keeping your car in top condition for years to come.
RECOMMENDED POST How Long Does It Take to Replace Fuel Injectors
How to Start Your Car After Changing Fuel Injectors
In this easy-to-follow guide, we’ll walk you through the step-by-step process of starting your car after changing the fuel injectors.
1. Double-Check for Leaks
Before starting your car, it’s essential to double-check for any signs of leaks around the fuel injectors. Even a small leak can lead to serious issues, so take your time to inspect the area thoroughly. Look for any drips or puddles of fuel and address any leaks immediately before attempting to start the engine.
2. Prime the Fuel System
After confirming that there are no leaks, it’s time to prime the fuel system. This will help ensure that the fuel injectors are properly pressurized and ready to deliver fuel to the engine.
To prime the fuel system, turn the ignition key to the “On” position for a few seconds, then turn it off. Repeat this process two or three times to ensure that the fuel system is adequately primed.
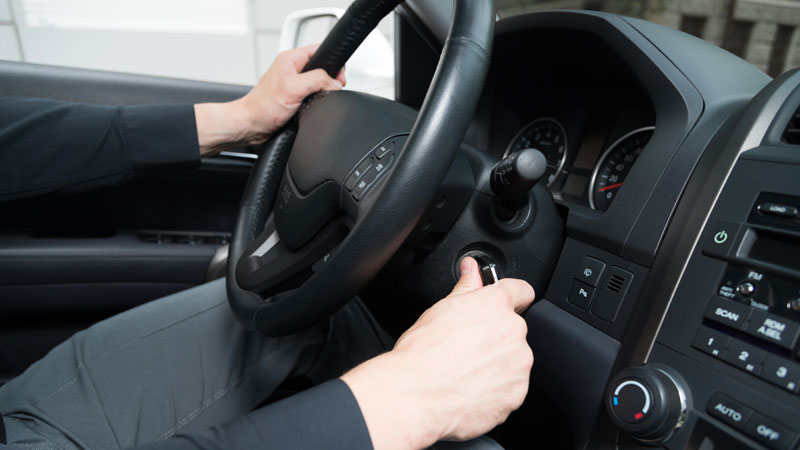
3. Start the Engine
With the fuel system primed, it’s time to start the engine. Turn the ignition key to the “Start” position and hold it there until the engine turns over.
Depending on your vehicle, it may take a few seconds for the engine to start, especially if it’s the first time starting after the fuel injector replacement. Be patient and avoid pumping the gas pedal excessively, as this can flood the engine.
4. Monitor for Smooth Operation
Once the engine is running, monitor it closely for any signs of rough idling or hesitation. The first few moments after starting the engine are critical, as any issues with the fuel injectors will likely manifest during this time.
If you notice any unusual behavior, such as rough idling or stalling, it may indicate a problem with the fuel injectors that needs to be addressed.
5. Take a Test Drive

After the engine has been running smoothly for a few minutes, it’s a good idea to take your car for a test drive. This will allow you to ensure that the new fuel injectors are functioning correctly and that your vehicle is running as it should.
Pay attention to how the car accelerates, idles, and handles at various speeds, and be sure to listen for any unusual noises coming from the engine bay.
Signs You Need New Fuel Injectors
Here are some common signs that indicate your vehicle may need new fuel injectors:
Decreased Fuel Efficiency
One of the most common signs of faulty fuel injectors is a noticeable decrease in fuel efficiency. If you find yourself visiting the gas station more frequently despite driving similar distances, it could be a sign that your fuel injectors are not delivering fuel efficiently. This inefficiency often results from clogged or malfunctioning injectors that fail to deliver the precise amount of fuel needed for combustion.
Engine Misfires
Engine misfires occur when the fuel injector fails to deliver fuel to a specific cylinder or delivers an insufficient amount. This can result in a lack of power, rough idling, or even stalling while driving.
If you experience any of these symptoms, it’s essential to have your fuel injectors inspected to determine if they’re the root cause of the problem.
Rough Idle
Faulty fuel injectors can cause your engine to idle roughly or unevenly. You may notice vibrations or shaking coming from the engine while the vehicle is stationary. This rough idle is often accompanied by fluctuations in engine RPM.
Poor Acceleration and Performance
Faulty fuel injectors can also lead to sluggish acceleration and overall poor engine performance. You may notice that your vehicle struggles to accelerate smoothly or feels less responsive when you press the accelerator pedal.
This decrease in performance can significantly impact your driving experience and may indicate the need for fuel injector replacement.
Check Engine Light
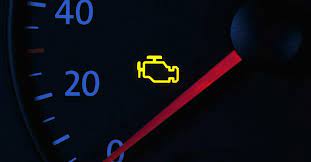
The illumination of the check engine light on your dashboard can indicate various issues, including problems with the fuel injection system. If the onboard diagnostic system detects a fault related to the fuel injectors, it will trigger the check engine light to alert you of the issue.
Strong Smell of Fuel
A strong smell of gasoline, especially inside the vehicle or near the engine bay, could indicate a leaky fuel injector. Leaking injectors can pose a fire hazard and should be addressed immediately to prevent accidents.
Excessive Exhaust Emissions
Faulty fuel injectors can also affect emissions control, leading to excessive exhaust emissions. If you notice black smoke coming from the tailpipe, it could indicate that the fuel injectors are delivering too much fuel, resulting in incomplete combustion. This not only contributes to air pollution but also indicates potential fuel injector issues that need to be addressed.
Step-by-Step Guide: How to Change Fuel Injectors
Prepare Your Vehicle
Start by gathering all the necessary tools and equipment, including new fuel injectors, a socket set, pliers, and a fuel line disconnect tool. Park your vehicle in a well-ventilated area and disconnect the battery to prevent any electrical mishaps.
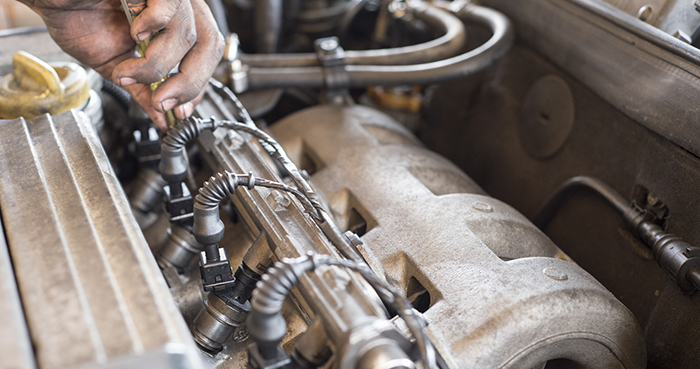
Locate the Fuel Injectors
The fuel injectors are typically located on the intake manifold or the cylinder head. Refer to your vehicle’s service manual or online resources to locate them accurately. Once located, carefully remove any components obstructing access to the injectors, such as air intake hoses or wiring harnesses.
Disconnect the Fuel Lines
Using a fuel line disconnect tool, carefully disconnect the fuel lines from each injector. Be sure to catch any fuel that may spill and dispose of it properly. Once the fuel lines are disconnected, remove any clips or brackets securing the injectors in place.
Remove the Old Injectors
With the fuel lines disconnected, use a socket set to loosen and remove the bolts securing the injectors to the intake manifold or cylinder head. Gently wiggle each injector to loosen it from its seat, then carefully lift it out of the engine bay.
Install the New Injectors
Before installing the new injectors, apply a small amount of clean engine oil to the O-rings to ensure a proper seal. Carefully insert each injector into its respective port, taking care not to damage the O-rings. Once all the injectors are in place, tighten the bolts to secure them to the intake manifold or cylinder head.
Reconnect the Fuel Lines
With the new injectors installed, reattach the fuel lines using the fuel line disconnect tool. Double-check that all connections are secure and tight to prevent any fuel leaks.
Reassemble Your Vehicle
Once the fuel injectors are installed and the fuel lines are connected, reassemble any components you removed earlier, such as air intake hoses or wiring harnesses. Reconnect the battery and start the engine to ensure everything is functioning correctly.
Test Drive and Monitor
Take your vehicle for a test drive to ensure the new fuel injectors are performing as expected. Pay attention to any changes in engine performance or fuel efficiency. If everything seems to be in order, congratulations – you’ve successfully changed your fuel injectors!
By following this step-by-step guide, you can change your fuel injectors with confidence and ensure your vehicle continues to run smoothly.
FAQs About What to Do After Changing Fuel Injectors
What could be causing my car not to start after changing fuel injectors?
After changing fuel injectors, several factors could prevent your car from starting. Common issues include improper installation leading to fuel leaks, a disconnected or damaged electrical connection, or air trapped in the fuel system. It’s essential to double-check the installation, inspect for leaks, and ensure all connections are secure to troubleshoot the problem effectively.
Can I drive my car immediately after changing fuel injectors?
Yes, you can, but it’s recommended to perform a test drive first to ensure everything is working correctly. Keep an eye on engine performance and any unusual symptoms.
How often should I inspect my fuel injectors after changing them?
It’s a good practice to inspect your fuel injectors periodically after changing them to ensure they are functioning properly. You can include fuel injector inspection as part of your regular vehicle maintenance schedule, such as during oil changes or tune-ups.
What should I do if the check engine light comes on after changing fuel injectors?
If the check engine light illuminates after changing fuel injectors, it could indicate a problem with the fuel injection system. Perform a diagnostic scan to retrieve error codes and identify the specific issue, then address it accordingly to prevent further complications.
Conclusion About What to Do After Changing Fuel Injectors
In conclusion, knowing what to do after changing fuel injectors is essential for maintaining your vehicle’s performance.
By following the steps outlined in this guide, including checking for leaks, priming the fuel system, performing a test drive, monitoring fuel efficiency, checking for error codes, and scheduling regular maintenance, you can ensure your car continues to run smoothly.
Remember, proper post-installation procedures are key to preventing issues and maximizing the benefits of your new fuel injectors. So, take the time to follow these steps diligently, and your vehicle will thank you with improved performance and longevity. What to do after changing fuel injectors is crucial, and with these guidelines, you’ll be well-equipped to handle the task effectively.